Shipping Z50
**All work done by appointment only! Please do not remove your engine without making an appointment! Contact me here**
DISCLAIMER: Each of the recommendations below were born from necessity & not just surmised from nothing. Some folks may get somewhat annoyed that they are being given directions on something as simple as how to pack & ship a little engine. The reality is that for every point i make below, someone has gotten it wrong because i didn’t advise them to do it otherwise. When i first started doing this kind of work, this page did not exist. Then, for every motor that arrived covered in oil, sticking out of the box or with all of what i don’t need & none of what i do, i have had to add a line to the sheet. The only reason you are being asked to do it right is because someone before you has done it wrong, so please excuse me.
How to remove, prepare & ship your engine:
BE SURE THE OIL IS DRAINED!
You’ll need to drain the oil from the engine before you ship it! Draining the engine oil is easier to do before the engine is removed from the frame. If the oil is not drained, it WILL leak out all over the packing materials & box. There will be a frowning delivery driver at my door asking me to pay for a Hazardous Materials charge. As well, I will have to spend time repackaging the engine with all new materials, as opposed to simply putting it back in the box it came in. That costs money.
The oil drain is the larger of the two bolts on the underside of the engine, directly in the center of the two case halves. It has a 17mm head on it. It IS NOT the 14mm diagonally mounted bolt that is off to the left side of the motor. Removing the 14mm is a waste of time, so don’t do it. Make sure that after you drain the oil that you re-snug the 17mm bolt to prevent any oil leakage into the packing material. Be sure to remove your shift lever and kick-starter before you ship.
You may notice a crankcase breather hose on the top rear of the engine. The hose should be about the size of the carburetor fuel line. If it’s there, just fold it in half & tape it in that position. If there is no line there & you have any kind of new or old fuel line around, please put it on the tube sticking out of the engine at the top rear, fold it in half & tape it in that position. If it’s not there & you don’t have anything to put there, don’t knock yourself out. Just leave it.
What to ship with the engine:
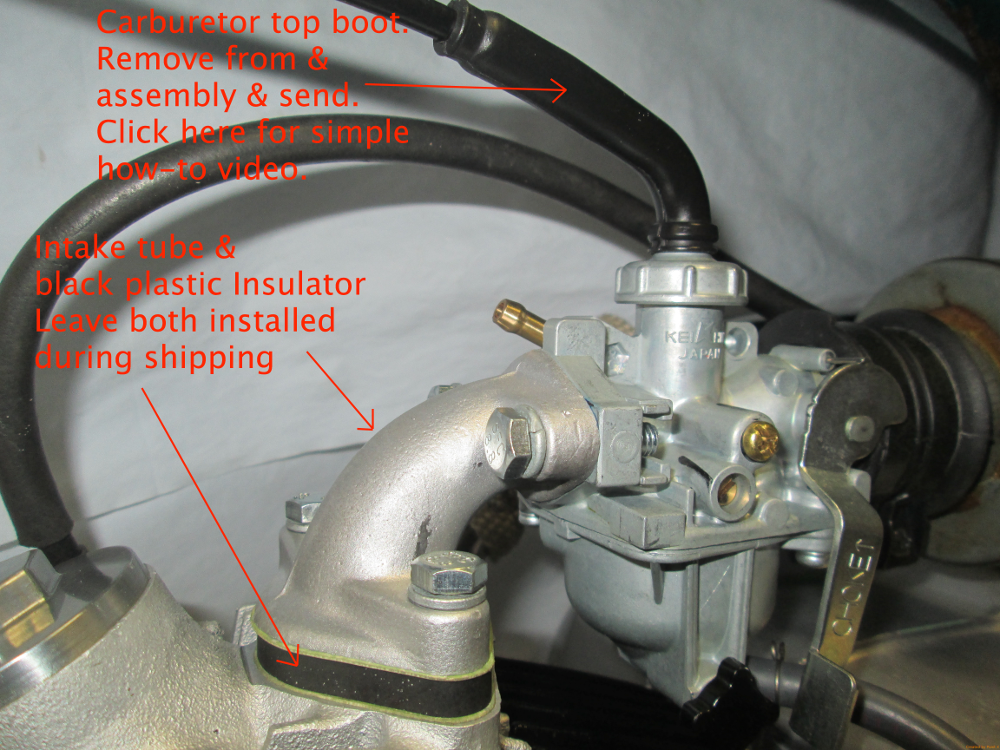
- Black plastic intake insulator (see photo below).
- Intake tube (see photo below)
- Left side engine cover (if you have one).
Insulator
All Z50’s up to and including the 1978 model have a black plastic insulator in between the intake tube & the cylinder head. I need that insulator as part of the process because i have to surface sand it to assure it is flat. If you don’t send the insulator to your 1978 0r older Z50, this means to me that you don’t have one & I will sell you one with the engine at a cost of $20.00. The insulators are no longer imported into the USA by American Honda & I have to get them direct from Japan at a cost many times what the standard pricing would be if they were still available.
Intake Tube
I also need the intake tube that sits on top of the insulator. Please pack both items with the engine. You don’t need to remove the intake tube at all so long as you use a box that is of sufficient height to fit the motor with the tube & insulator left in place, which is what i recommend*. You’ll find info with regards to what size box to use to ship your motor further down on this page. If you must remove the intake tube or if you can’t reattach it, you should affix it to the motor so it does not get lost in the packing. The best way to do this is to run a piece of string/wire/zip tie through the intake tube itself & tie it around the cylinder, or through on of the engine mounts. If you remove the intake tube & the intake insulator stays stuck to the motor, leave the insulator there. If you remove the intake tube & the insulator comes off with it, you can attach it to the same piece of string/wire/zip tie with the intake tube. Just situate the insulator so that the weight of the engine does not rest on it during shipping. Do not apply tape to the engine. The glue from any kind of tape is darn near impossible to remove from porous aluminum. Do not tape anything to the engine itself.
Throttle Cable Rubber Boot
If you are opting for one of my carburetor kits for your Z50, you must include the black rubber throttle cable boot at the carburetor end of the throttle cable. See photo below. The reason for this is the same as the need for the intake insulator. Honda has stopped supplying this part to USA & in order for me to source a new one, i have to get it direct from Japan at a cost many times the original price. Save yourself $20.00 & make sure you ship this rubber boot. If you don’t ship it & I have to supply one. That’s not a problem. It’s just that i have to charge you what i have to pay for them, which is 4 times as much as when they were available in USA. You can remove the boot easily. If you click the photo below, it will bring you to a video on showing the removal of the boot. Reading on will give you a step by step. I suggest both.
Boot removal directions: When the carburetor still installed on the bike, pull the boot away from the carburetor cap a few inches to expose the threaded brass cable adjuster. Tighten the adjuster so that it goes towards the carburetor, until it stops. This will give you maximum cable slack. Make sure the throttle is closed. Unscrew the throttle cap from the top of the carburetor & pull the slide out. Access the throttle return spring at the slide. Bend the spring like a banana so that you can get your finger nails in the winds of the spring. Compress the spring by pulling each wind of spring one by one toward the cap end. Once the end of the cable is exposed & the spring clear of the slide, push the cable towards the slide & release the end of the cable through the groove running down the slide. Pull off carb cap & then rubber boot.
Shipping Container Choices.
The general rule is that the engine should be in a box with sufficient enough height on the top so that it will fit in the box with the intake tube attached so that when i send back the left side cover and/or carburetor, there is enough room to do so without shipping a separate box.
I can refinish the left side engine cover/magneto cover/drive sprocket cover for you to match the refinished right side engine cover/clutch cover. If you are shipping the left side engine cover,be sure to remove it and pack it separately on top of the engine, so as to avoid getting damaged (the tab at the rear of the cover is very fragile and often arrives broken if the cover is left on). If you can’t get the cover off, make sure you pack the motor in the box with that delicate cover facing up & with plenty of packing material under the engine. If you can’t get the left side cover off & you don’t properly pack the engine, the tab will break off & if that happens, the cover is useless.
What not to ship with your engine:
Do not ship any of the following items, as all they will do is make the repacking job more difficult & possibly more expensive to you because it may mean that i will ship back the excess parts in a separate box so as not to damage the freshly rebuilt engine:
Kickstart, shifter,exhaust,air filter,throttle cable.
What to use to ship your motor:
DO NOT USE PACKING PEANUTS to ship your motor. Crumpled newspapers work fine. Old clothes, clean rags. You can be inventive, but just make sure it does not look like it’s going to make a mess when i pull it out.
Shipping your motor in a cardboard box within another cardboard box & some strategically placed cardboard and/or crumpled newspaper does just fine. The box should be 16″ tall, which will allow for 3 inches of packing material on both the top & bottom of the engine. See below for more recommendations.
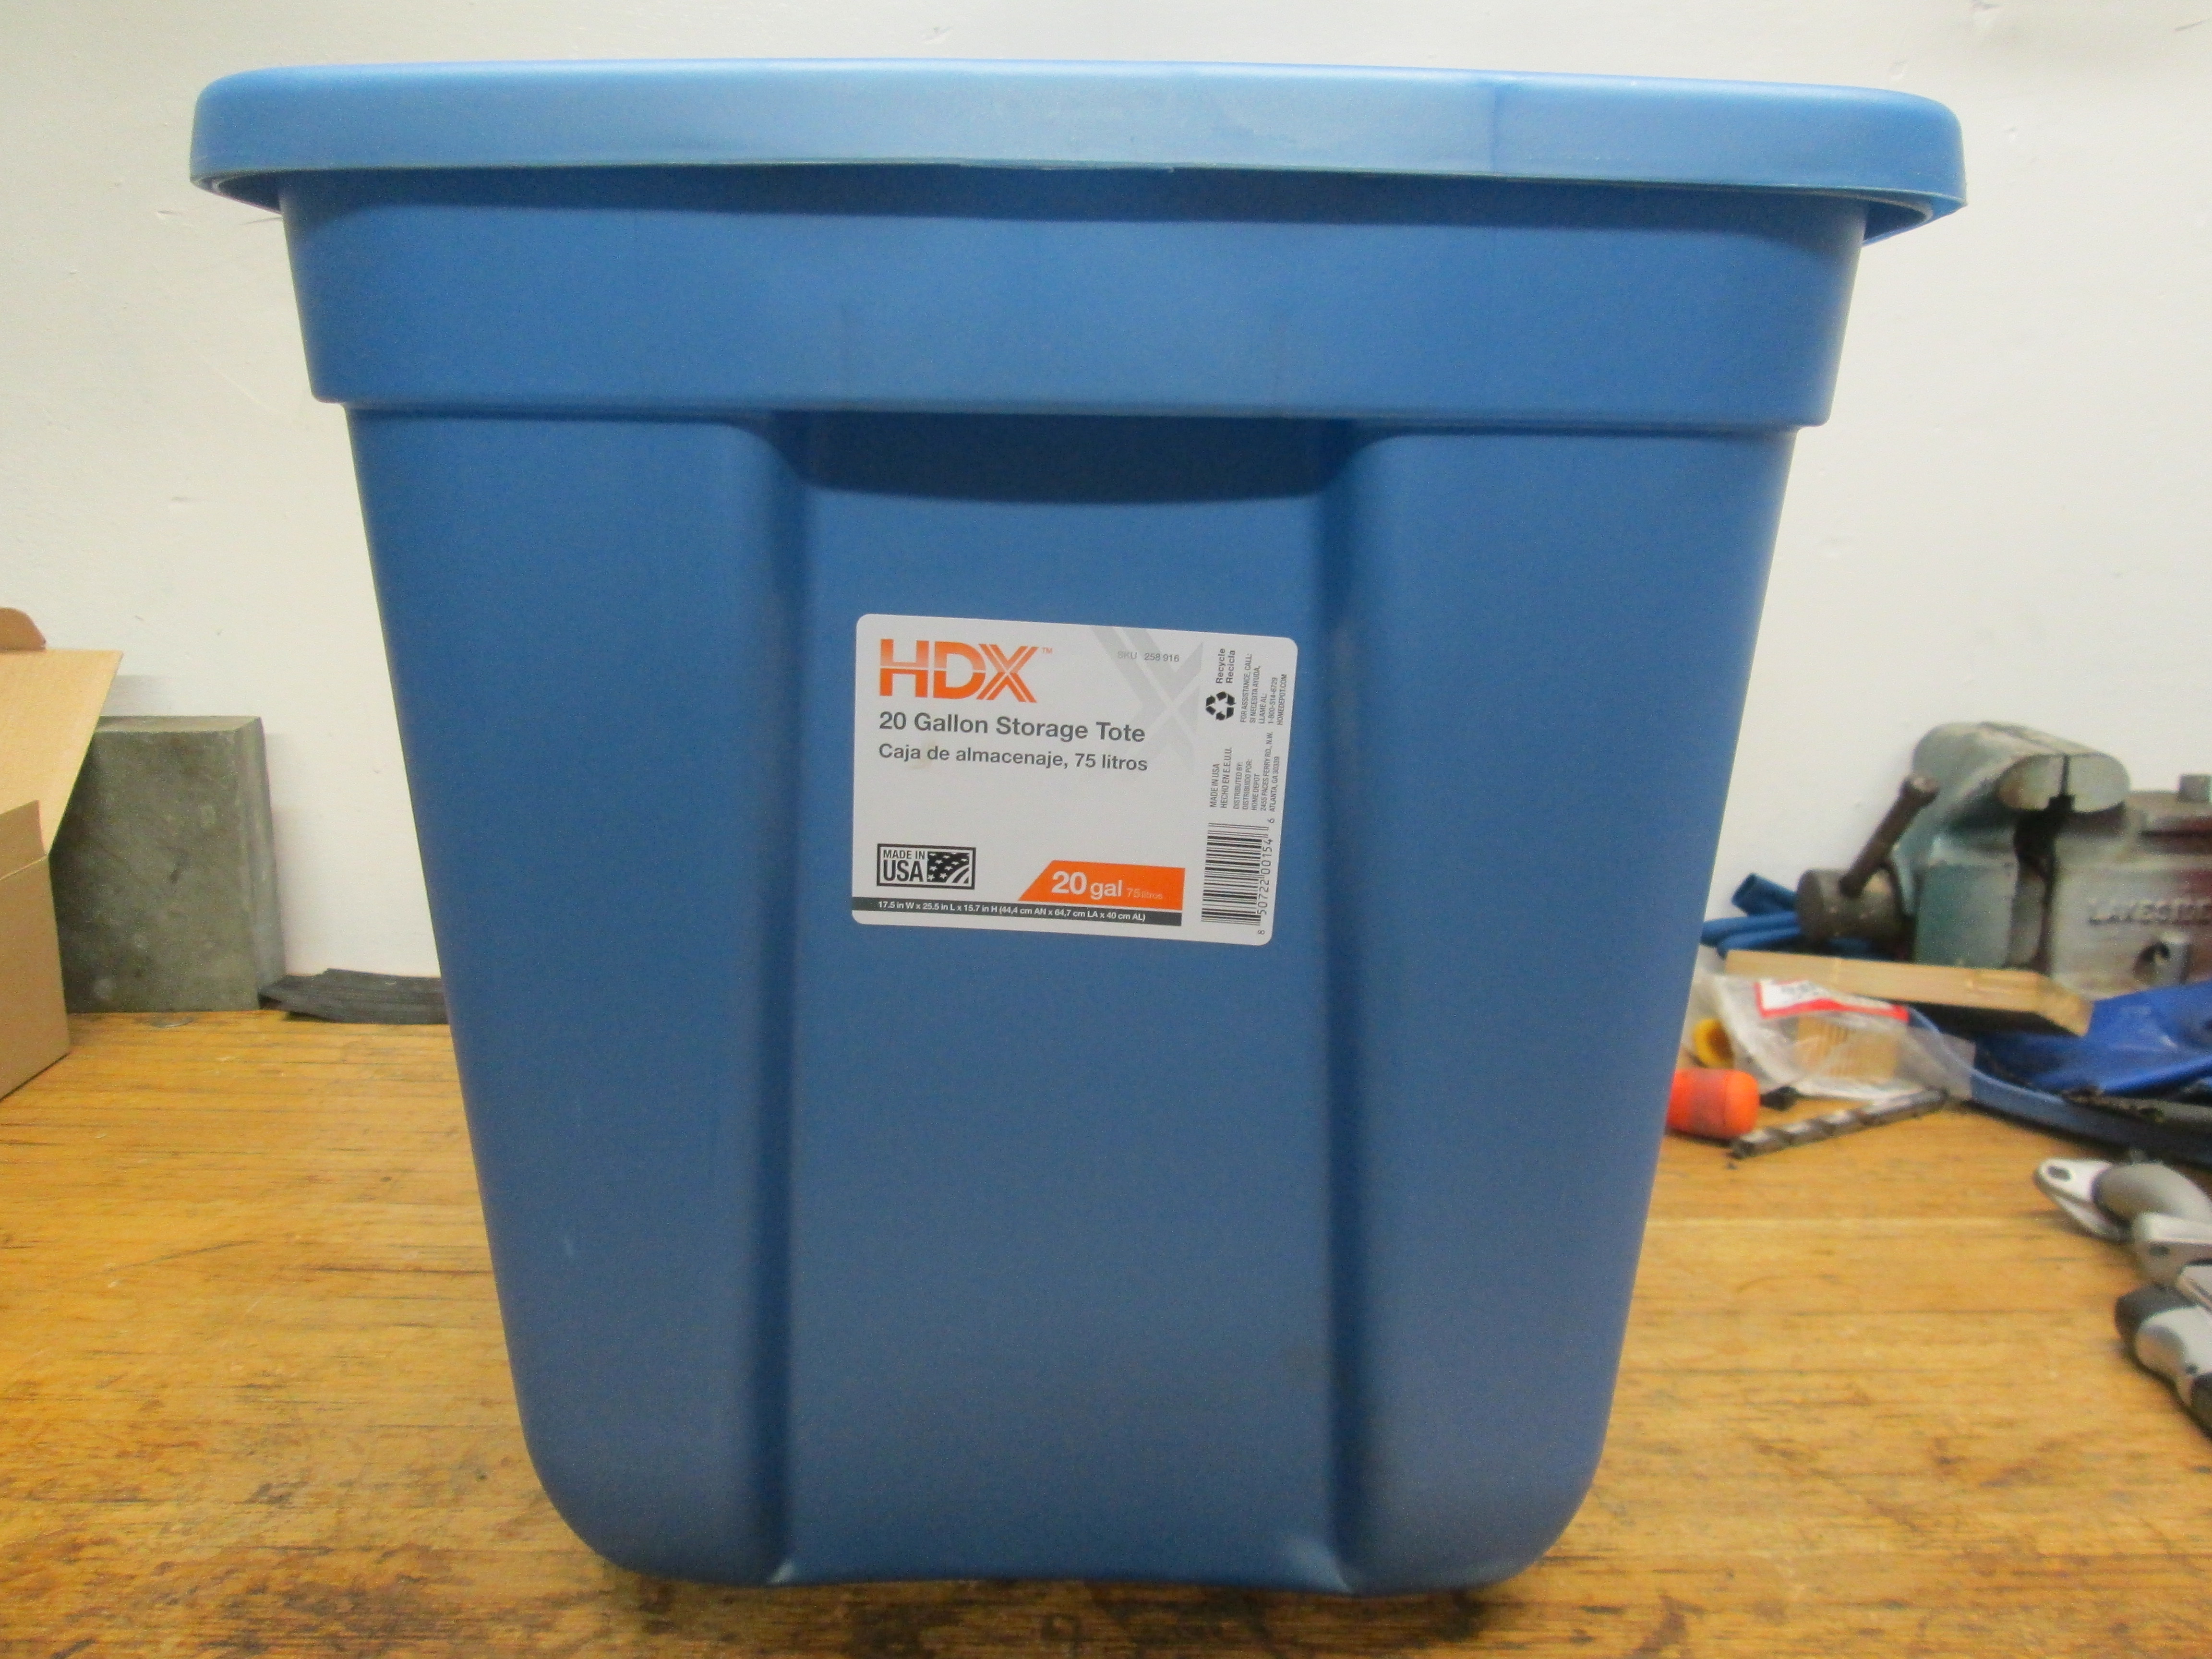
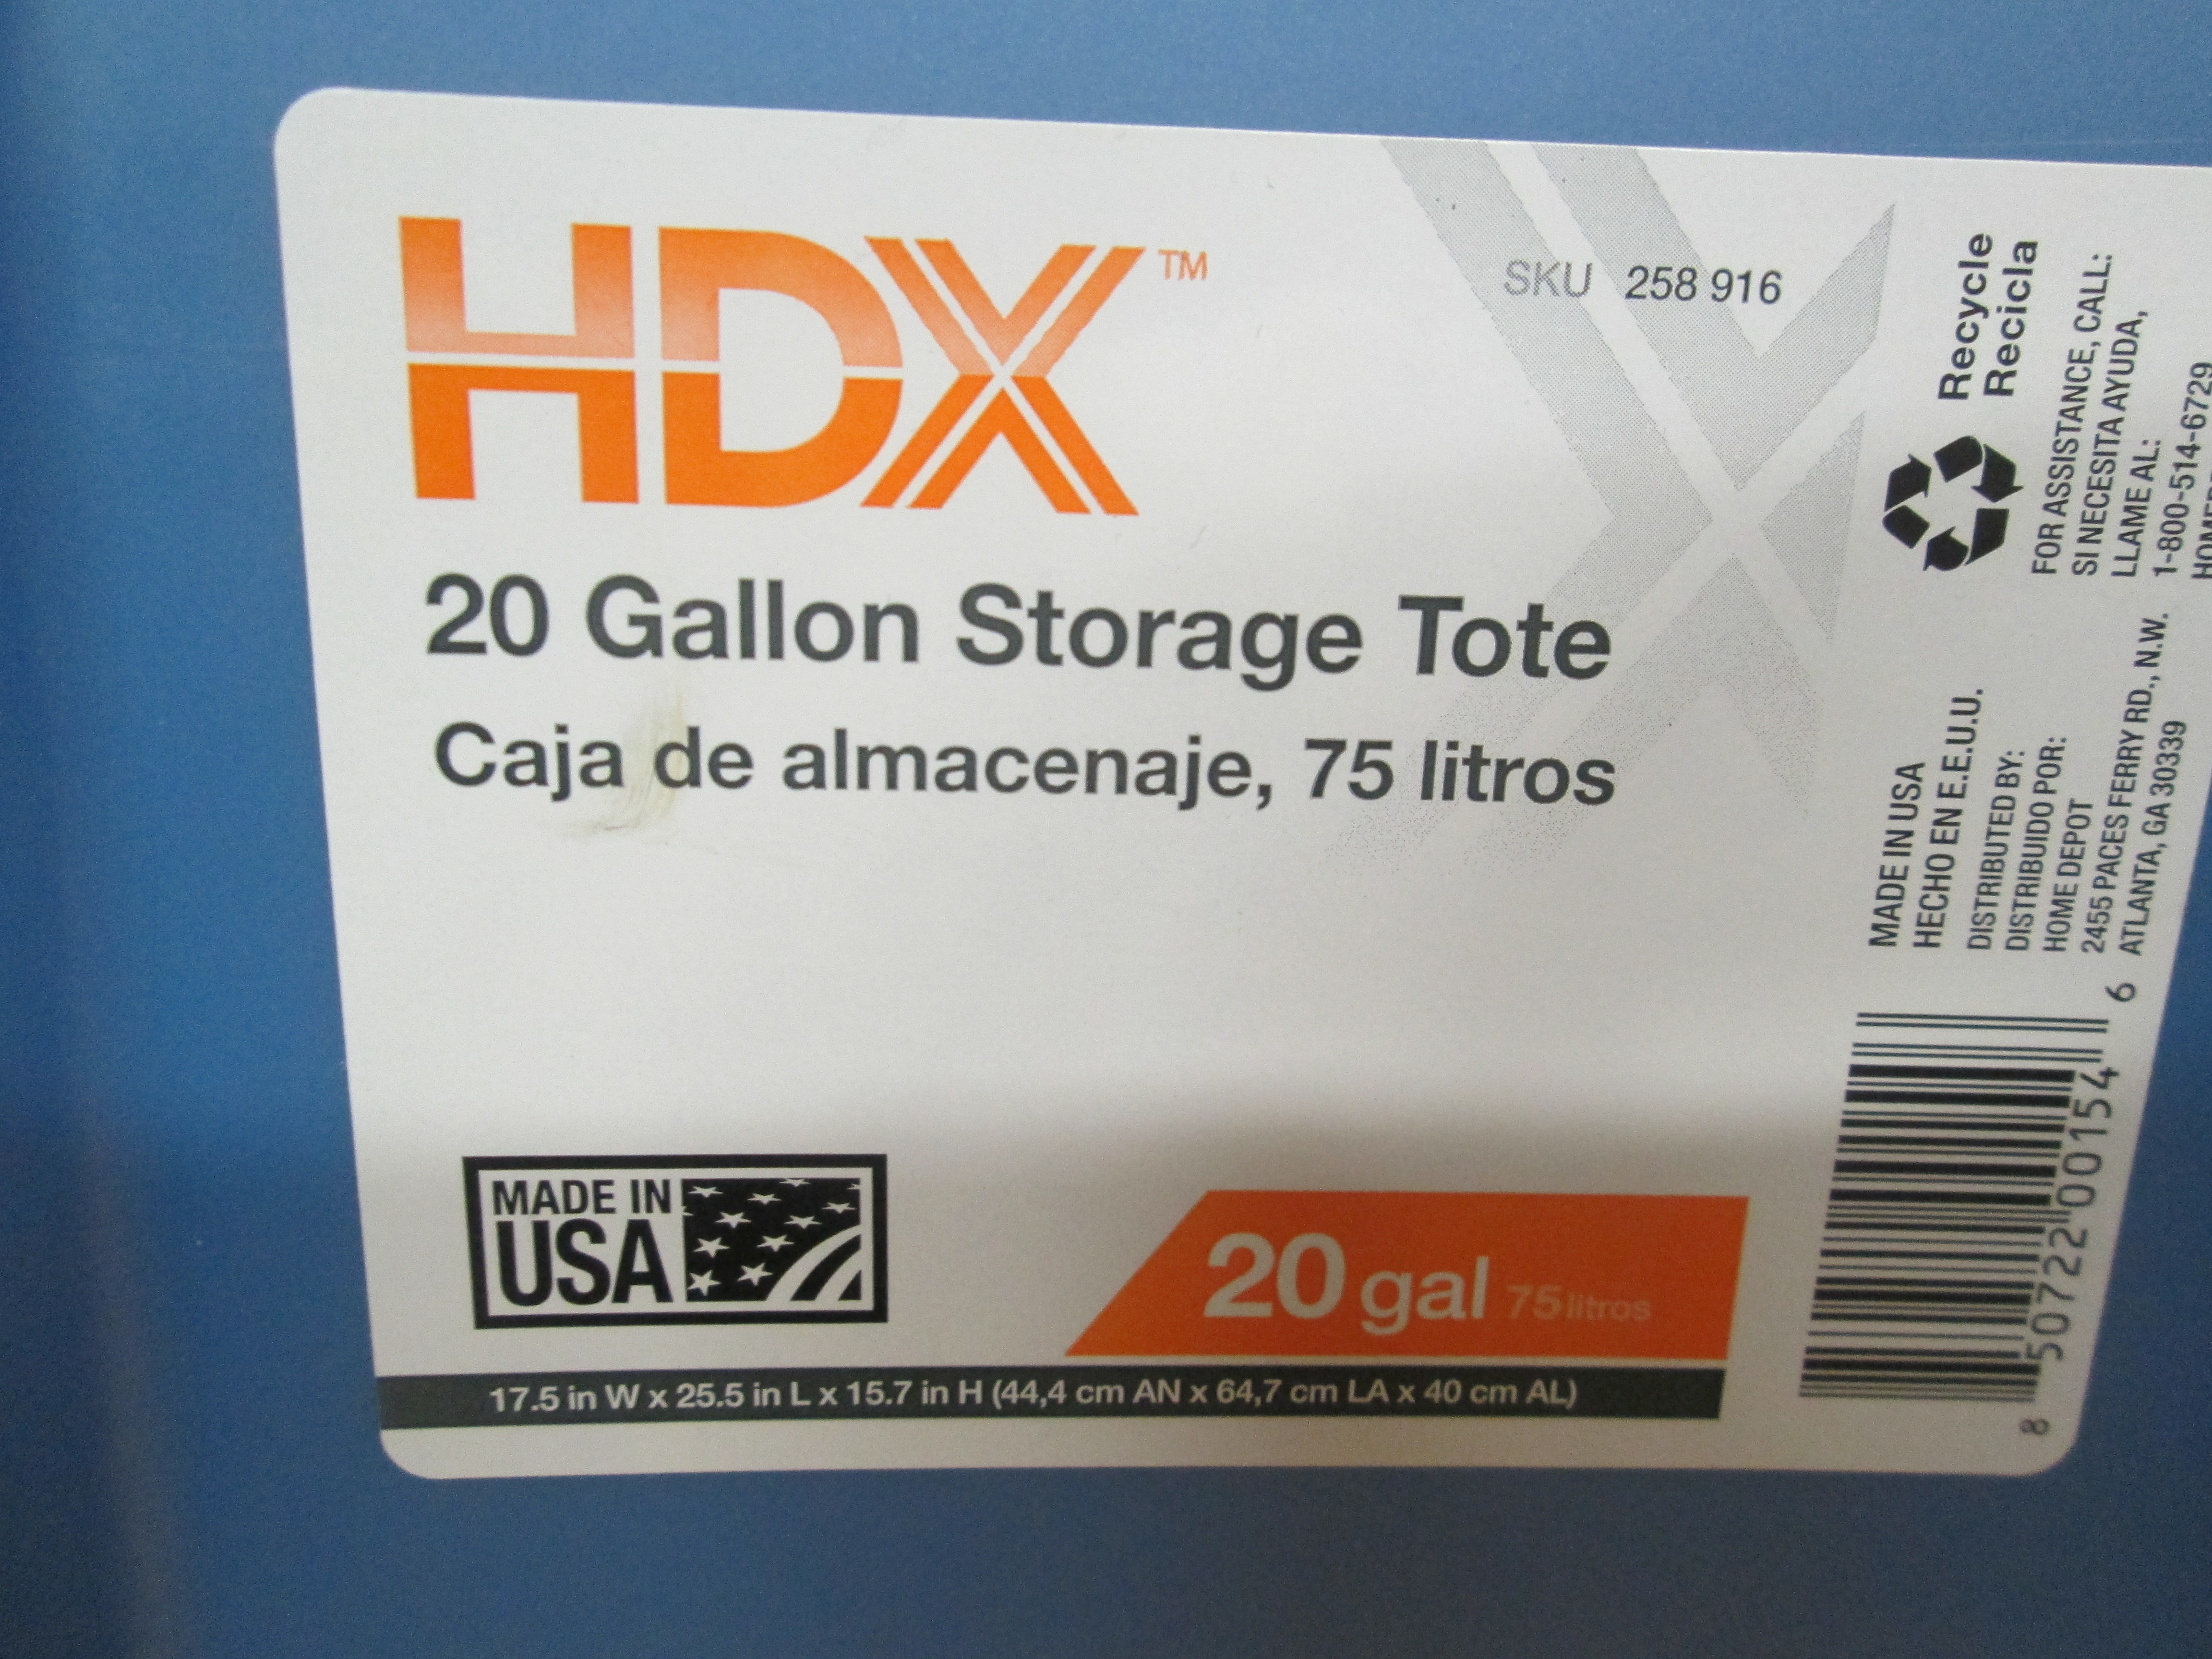
I do highly recommend that you ship in a Rubbermaid style container, as they actually do a very good job. It’s not imperative though. A cardboard box inside another cardboard box world fine, but for many, that’s not easy to find. Please take note that just because the engine fits in a cardboard or manufactured shipping container, doesn’t mean it will arrive safely. Those Rubbermaid style containers come in various sizes. DO NOT use the ones that are of the 8-9″ tall variety. I have received engines with cracked cases because there is simply not enough room on the underside of the engine for packing material. They make a 12″ tall one, which is also not recommended for the same reason. If you are going out & buying one for this purpose, get the ones that are at least 16″ tall. This will allow for plenty of room on the underside of the engine for packing material which and also allow enough room on top to ship the engine cover & or carburetor. Both of these are critical. If i don’t have room to ship the engine back with all of the parts that you will be getting back, i will have to ship it all back in two boxes & that will easily negate any savings on your end. If you can get ahold of a 16″ tall Rubbermaid style box, it will save you sufficient grief during the actual packing process.
*Don’t ship in a wood box. Somewhere in the United States Post Office depot Pittsburgh, Pa., there is a freshly rebuilt CT70H engine in a wooden box. It’s the only motor of mine that the post office has ever lost & it was in a wooden box. USPS has stated that their automated machinery/powered conveyer belts don’t get along well with wooden boxes.
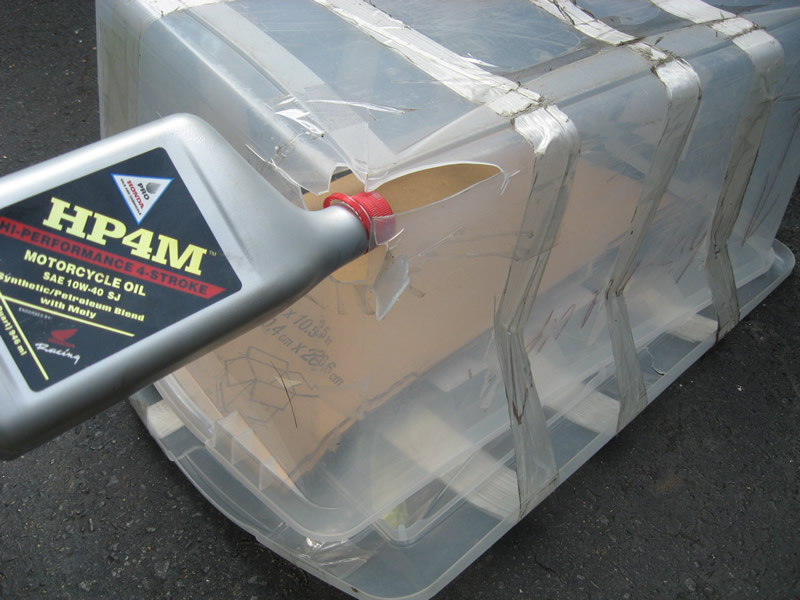
*Note: Do not ship in hard acrylic-like plastic containers or your shipment could end up like this. Softer rubbermaid or similair boxes are recommended. Please click on the pictures below to enlarge.
General rule is if you can see through it, don’t use it to ship.
Turnaround Time & Shipping Address.
My turnaround time is typically 6-8 weeks.
I am just forewarning all customers of this scenario & for the time being, please click this link & send an email stating that you would like an engine restored. I will send you back the necessary information in order to properly pack & ship your engine.
If shipping via Fed Ex or another company that requires a phone number, please furnish your own phone number. I don’t have a listed phone number because i am only one man & as it is, it already takes weeks to turn one motor around because of the backlog of work i have. If i started fielding phone calls regularly, the turnaround time would get even longer.
The nature of my work generally does not require phone contact. That being said, this does not mean that you can’t reach me. If you need to reach me, send me an email with your phone number & a good time to call & I will call you back within a couple of hours, M-F. A little longer on the weekend. The number i will call from is a cell phone number that you won’t find listed in the white pages or in any other listing. I must caution against looking up a phone number that is/was attached to my name via normal white pages-like info. If you cannot wait for me to respond to your email & decide that you want to call a number that was once listed under my name, you will likely get ahold of someone that is not happy to hear from you when you are asking for me because they have been called a few too many times. Don’t call the number that is attached to my physcial mailing address. You won’t like the result. Use the number that i send you in the email & ONLY that number. If you call the wrong number, you will be instructed to call the number in the email that you should have sent.
On the container itself, write your last name in marker IN BIG BOLD LETTERS on the outside of the box so that when you check to see
if i have received your engine, i can tell without having to open the box. Many folks ship from a “Mailboxes Etc.” type place
& I cannot tell what the customers name is unless i open it.
Once the engine is completed & tested, i will send an invoice for the balance. At that point, i will have a significant amount of equity tied up in your engine. It is generally better that the payment for the balance arrives sooner rather than later, when possible.
If you have any questions with regards to any part of the process, please just ask by sending me an email @ enzo@motoenzo.com
Thank you.